
Introduction
In this blog, you will learn how to deploy node.js application into Kubernetes engine using Helm charts. Before helm charts, users need to run the YAML files like deployment.yaml, service.yaml, ingress.yaml and dns.yaml individually. Now we can run all the files together using Helm Chart with a single command. This way, we can save a lot of time and reuse this chart in multiple environments.
Prerequisites:
- GCP free tier account
- Create a Google Cloud Platform (GCP) project or use an existing one.
- Enable the following APIs
- Kubernetes Engine API.
- Container registry API.
- Basics of Kubernetes & Helm
Helm Chart
Helm is a Kubernetes-based package installer. It manages Kubernetes “Charts”, which are pre-configured packages of Kubernetes resources. Helm enables you to easily install packages and make revisions.
Google Kubernetes Engine(GKE)
Google Kubernetes Engine(GKE) is used to manage the containers, like managing to start the containers, run and deploy the containers manually. It’s very difficult for us doing automation through the Google Kubernetes engine.
Container Registry
Container Registry is a service of Google cloud and its storing container images.
Helm installation
- Navigate the GCP console.
- hit on the Cloud Shell
 button
 - To download the latest version, use the wget command
wget https://get.helm.sh/helm-v3.9.3-linux-amd64.tar.gz - Using the tar command, unzip the .gz files.
tar xvf helm-v3.9.3-linux-amd64.tar.gz - Move the linux-amd64/helm file to the /usr/local/bin directory:
sudo mv linux-amd64/helm /usr/local/bin - To check the version of Helm, use the below command
helm version
Create a Kubernetes Cluster and connect to cloud Shell
In this step, we need to deploy our application through helm charts. So, it supports Kubernetes Engine and then creates a cluster to use Cloud shell (or) console.
Type 1: Using Cloud Shell
- Set your Region
gcloud config set compute/region REGION - Create cluster name as my-app
gcloud container clusters create-auto my-app
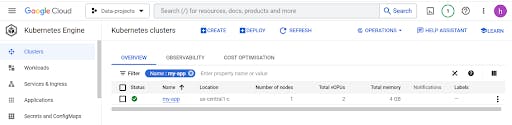
Type 2: using the GCP console
- Go to the Kubernetes Engine in GCP Console.
- Now hit on the “Create cluster”.
- enter the name as my-app
- Click Create.
Once cluster created then Use the below command to connect cluster in cloud shell
gcloud container clusters get-credentials my-app –zone us-central1-c

Create an application:
We need an application to deploy on our cluster. We will create a simple Node.JS app in this section.
Open Shell here; we will create a directory for our app using the below commands
mkdir my-app && cd my_app
Now create the following files in the my-app directory:
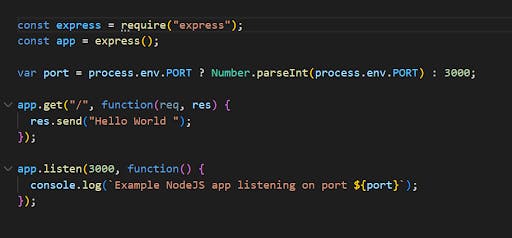
server.js file to store our app code:
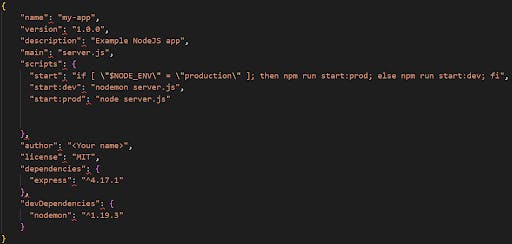
package.json file to store the metadata of our app and its dependencies:
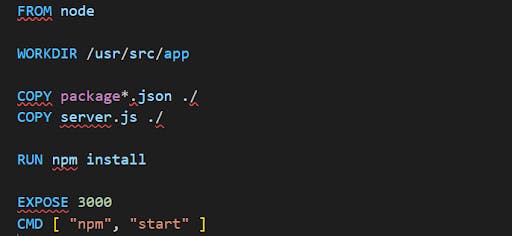
Dockerfile file to describe the docker image of our application:
Now we have three files in the `my_app` directory
- Server.js
- Package.json
- Dockerfile
Build the Docker Image:
Now to create Docker image use below “build” command:
docker build –t IMAGE_NAME
now check the images using the below command
docker images
Pushing Docker Image To Container Registry:
now we need to push the image to the container registry using the below commands
docker tag IMAGE_NAME gcr.io/PROJECT_ID/IMAGE_NAME
docker push gcr.io/PROJECT_ID/IMAGE_NAME
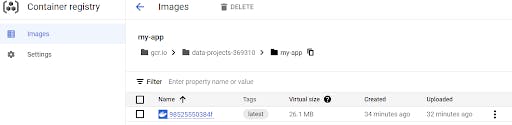
now you can check images in the container registry
- Hit on left side menu bar, scroll down
- Hit on Container Registry.
Create a Helm Chart
Helm allows us to template our Kubernetes resources manifest files. A standard Helm chart has the following structure:
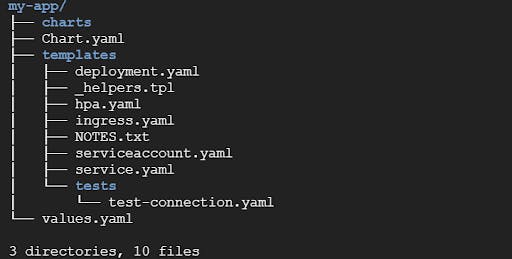
- Templates: Templates folder have multiple yaml files like deployment.yaml, service.yaml, ingress.yaml, secret.yaml and dns.yaml for application deployment. They will all get their values from values.yaml from above.
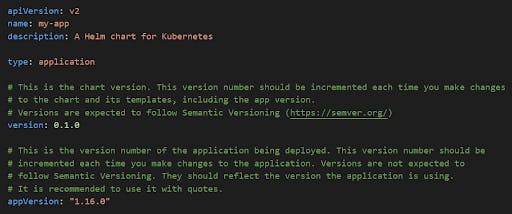
- Chart.yaml: It is all the information about the chart being packaged. Here we need to mention our chart name and version.
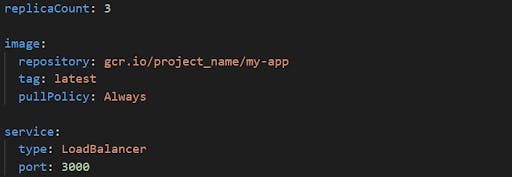
- Values.yaml: This file can be edited to customize the configuration of a chart, or the values can be passed in as arguments during the installation of the chart.
- Charts: If your chart is dependent on some other charts, this is where you store them. You will be calling another chart for your chart to function properly.
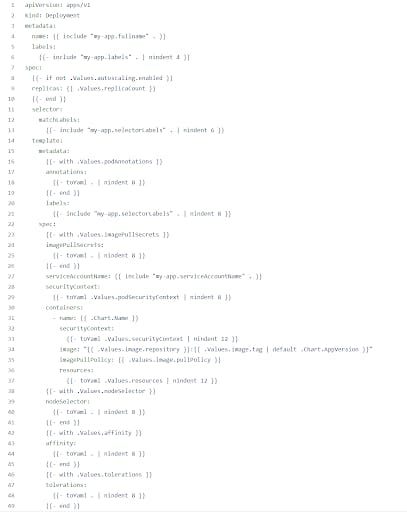
deployment.yaml
Service.yaml
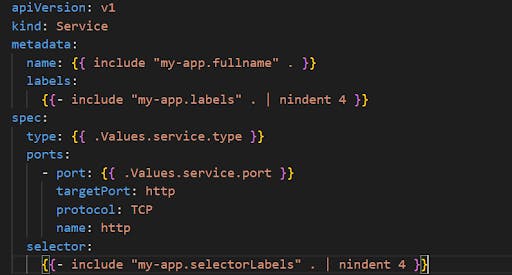
Chart.yaml
Values.yaml
Deploy the Helm chart
Now helm chart is ready to deploy once we run this command helm install my-app. Our node.js application will be deployed on the GKE.
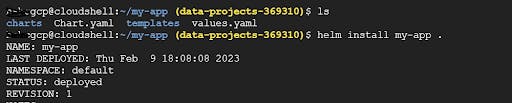
Now our application is deployed, you can check the status in the above screenshot, and You can confirm this by navigating to the console for verification.
Console🡪Kubernetes Engine->Workloads

Console🡪Kubernetes Engine->Service&ingress

Here we have Load Balancer’s public IP; now, we will see the output.
Output
Now you can use the curl command or simply use your browser to check the output. You should see a pretty "Hello World":

Finally, we deployed our Node.js application into Google Kubernetes Engine using the Helm Charts method.
Using this Helm chart method, we can easily deploy our applications into multiple environments
- The DevOps team once created the helm chart, can use it for multiple environments like development, testing and production etc.
- Helm chart makes it easy to modify default values in the values.yaml file
- As per requirements, the users and developers can take changes while installing the helm charts
References:
- Helm: Helm Overview
- Google Kubernetes Engine: Google Kubernetes Engine (GKE) | Google Cloud
- Container Registry: Container Registry | Google Cloud
- Free Tier account: Free Google Cloud Platform Account | Google Cloud Free Account Steps
