

Every software release must adhere to the testing procedure for quality deliverables, and several automated testing methods are available to enable this. The highest quality images are created by optimizing key image quality factors like sharpness, blur, noise, data compression losses, etc. Picture quality can be defined as the degree of accuracy with which various imaging technologies record, process, store, compress, transmit, and display the signals that make up an image. As a result, automated image testing emerged strongly and in its own style.
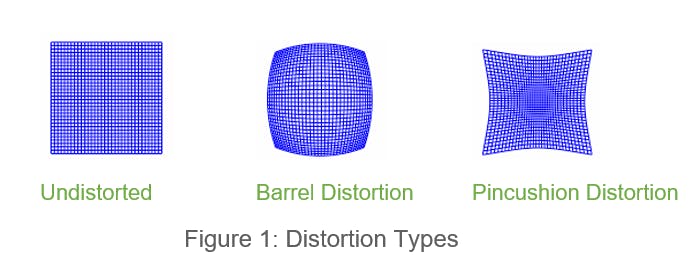
This blog focuses on improving image quality and removing distortions during testing in the display unit. We can rectify the types of distortion caused by cameras, find the intrinsic and extrinsic properties of a camera, and undistort images based on these properties. For example, if a particular display unit is not placed correctly, then the captured image may not be proper. To solve this, we must go for camera calibration to get the camera's matrix values, find the corners, do the undistortion, and process the images. While performing the automation in display units, image capturing might face problems with respect to angles, etc. The distortions in the captured image must be removed to rectify this. Figure 1 shows the various possible distortions in the image.
Detailed View
The following picture depicts the general overview of camera calibration of images, which requires certain steps to be performed, in order to get the accurate result image.
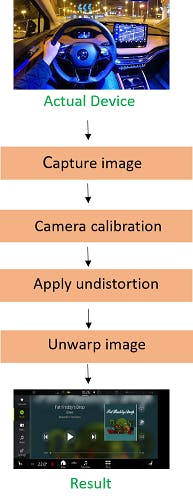
Figure 2: Process Flow
Camera calibration is the process of estimating a camera's parameters. In Figure 2, the original image contains distortion due to the camera angle. After applying undistortion, the image is clearer and contains the specific part of the image. Camera calibration comprises of following a flow that defines real-world coordinates of 3D points using a checkerboard pattern of known size. Capture the checkerboard images from different viewpoints, find 2D coordinates of the checkerboard and calibrate the camera. And then, use these output values of camera calibration to apply undistortion and go ahead with unwarping the image to get the perfect output image. Camera calibration involves the following steps:
- Read image: Here, the image is captured and stored.
- Convert color: This will convert the color of the captured image to a grayscale image.
- Get Corners: This will return the corners of the image, along with its status.
- Calibration: This will perform camera calibration and get the matrix and distortion values for the image.
Moving Forward
This blog focused on how the image calibrations are done for various types of images:
Before Calibration:
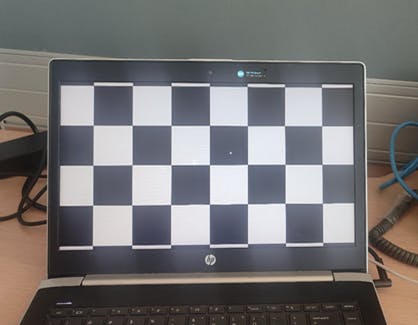
Figure 3: Captured Image
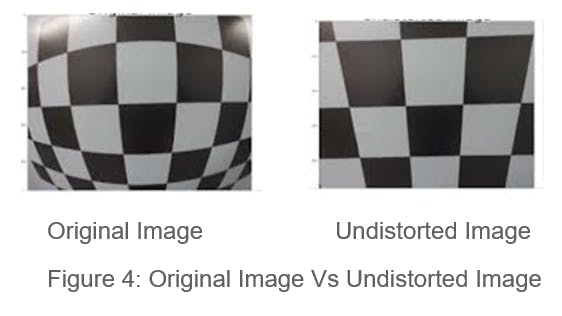
This is the originally captured image using the camera. The same approach can be applied to the images with labelled corners, but this will be a more professional approach that can be done in all scenarios. Image distortion occurs when the straight lines of an image appear to be deformed or curved unnaturally. Distortion is often the result of the lens's geometrics. It can significantly disrupt the image quality, so we need to remove the barrel distortion in the captured image, as in Figure 4.
After Calibration:

After performing the image calibration mechanisms, the image is clearer, and gets the exact display after removing the background, as shown in Figure 5.
Conclusion
With this methodology, test automation may be carried out on a single computer while various photos/ captured images can be processed simultaneously. It is the most reliable, cost-effective solution and simpler to set up and use. In this way, we can record dynamic scenes with any type of display unit since it’s not dependent on camera position and can be processed more effectively.
Therefore, it is now necessary to acknowledge the significance of image testing from several perspectives.

This blog focuses on improving the image quality and removing distortions during testing in display unit
References
https://learnopencv.com/understanding-lens-distortion/ https://tejakummarikuntla.github.io/blog/camera-calibration-with-opencv/index.html
