What is API automation and why Blazemeter?
Application Programming Interface (API) testing involves evaluating the functionality, reliability, performance and security of an API. As APIs connect different software systems, enabling them to communicate and share data, testing ensures they operate seamlessly and handle various scenarios, making it a crucial aspect of software development and maintenance.
Blazemeter facilitates rapid API test creating and monitoring from the initial stages of development to production. It integrates smoothly with open-source and third-party tools like Jenkins, Slack and more, providing timely notifications to the relevant teams in case of API issues. Additionally, Blazemeter API Monitoring can be combined with performance and load testing to conduct comprehensive stress tests on APIs, supporting a shift-right continuous testing strategy.
Advantages of API automation:
- Efficiency and speed: Automated tests run more quickly and efficiently than manual tests
- Reusability: Automated API tests can be reused throughout different development stages and environments
- Consistency: Automated tests provide consistent and repeatable results, crucial for ensuring that API changes do not introduce unexpected issues
- Regression testing: Automated API testing is particularly valuable for regression testing
- Early defects detection: The API test suite could be integrated into the CI/CD pipeline to discover defects early in the development cycle
- Cost-effective: API automation involves some initial development cost, but long-term it helps in cost savings by automating repetitive tasks and validations
Automating APIs in Blazemeter
Create a new workspace in Blazemeter and then click on Create Test dropdown to create your first API automation test.
It has 2 options: New Test and Import Test
- New Test: To create a new API automation script from scratch
- Import Test: To import an existing API test from an external source, be it an existing Blazemeter script or Postman or from any other API automation source.

Post clicking New Test, the user will get the below screen where he or she can start writing their API automation test.
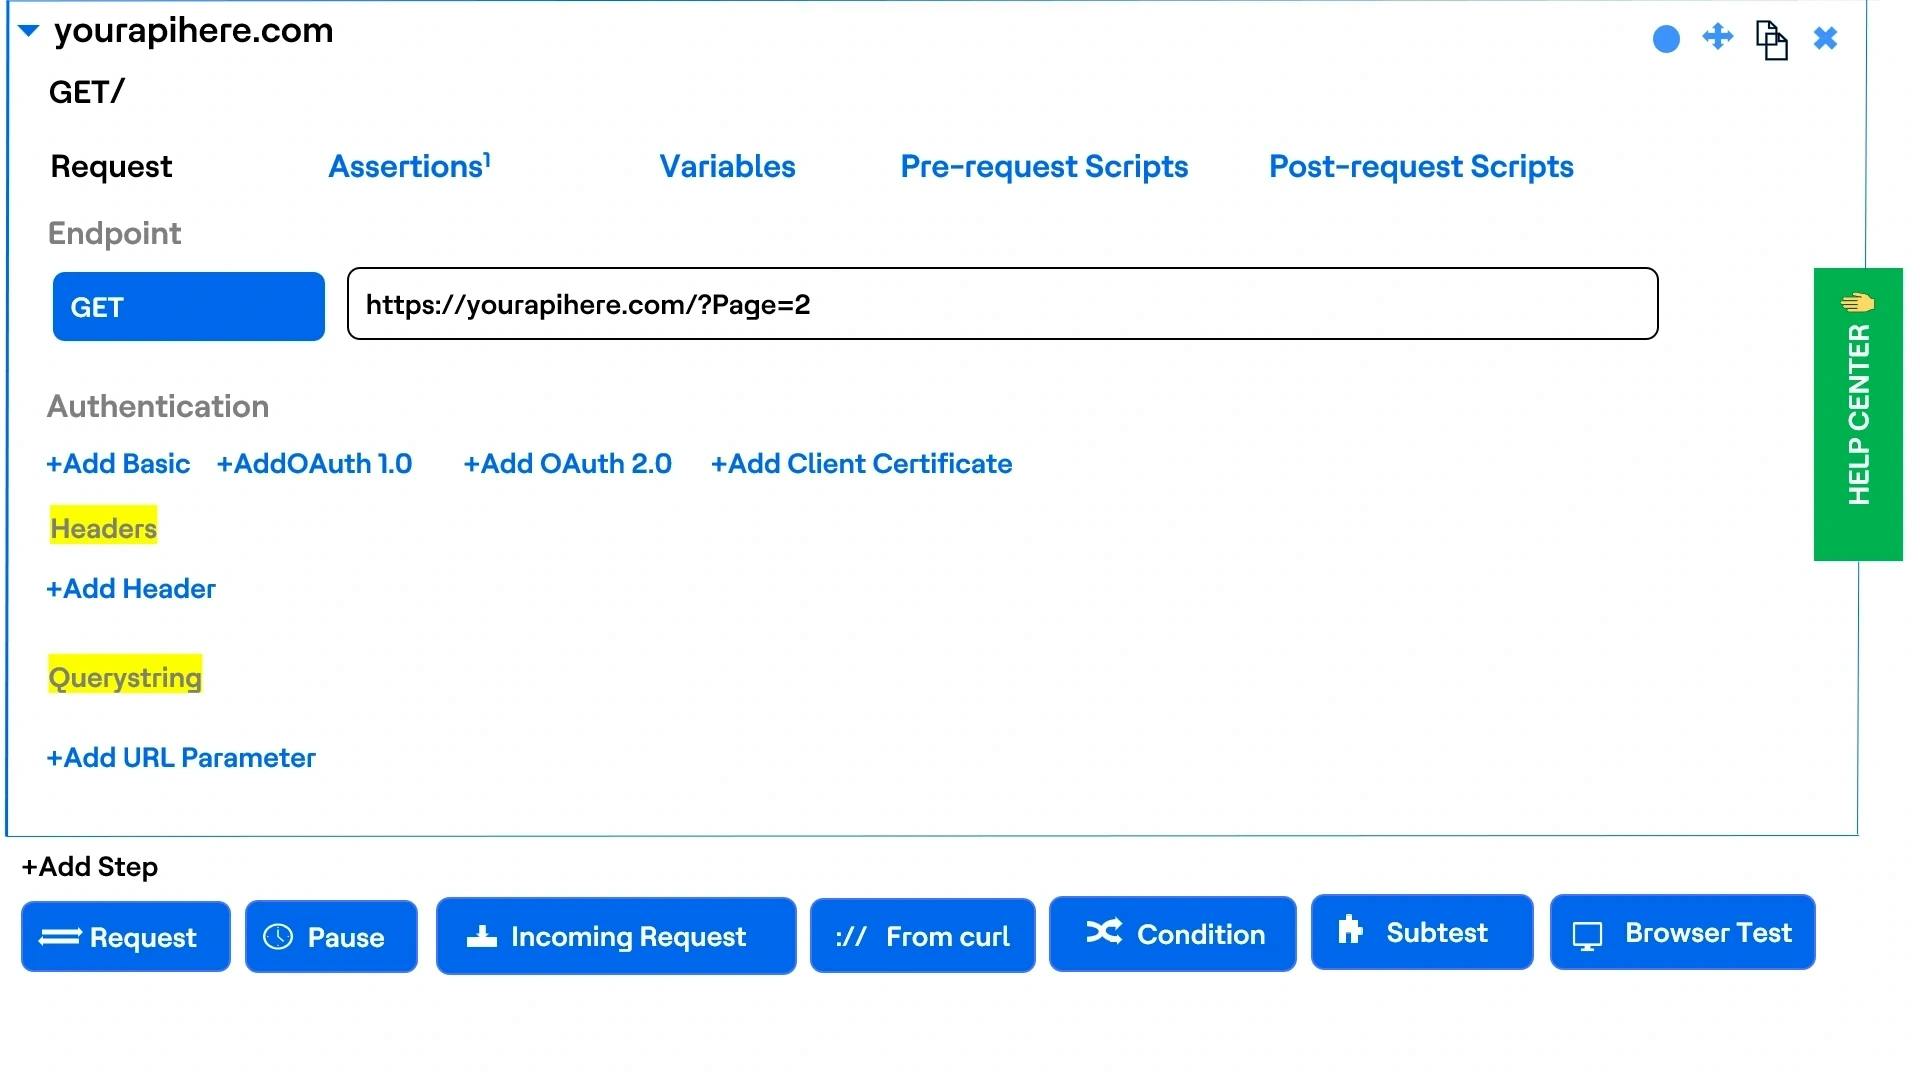
First, select the request type (GET, POST, PUT, PATCH, DELETE, etc.) and provide the URI for the API that needs to be triggered.
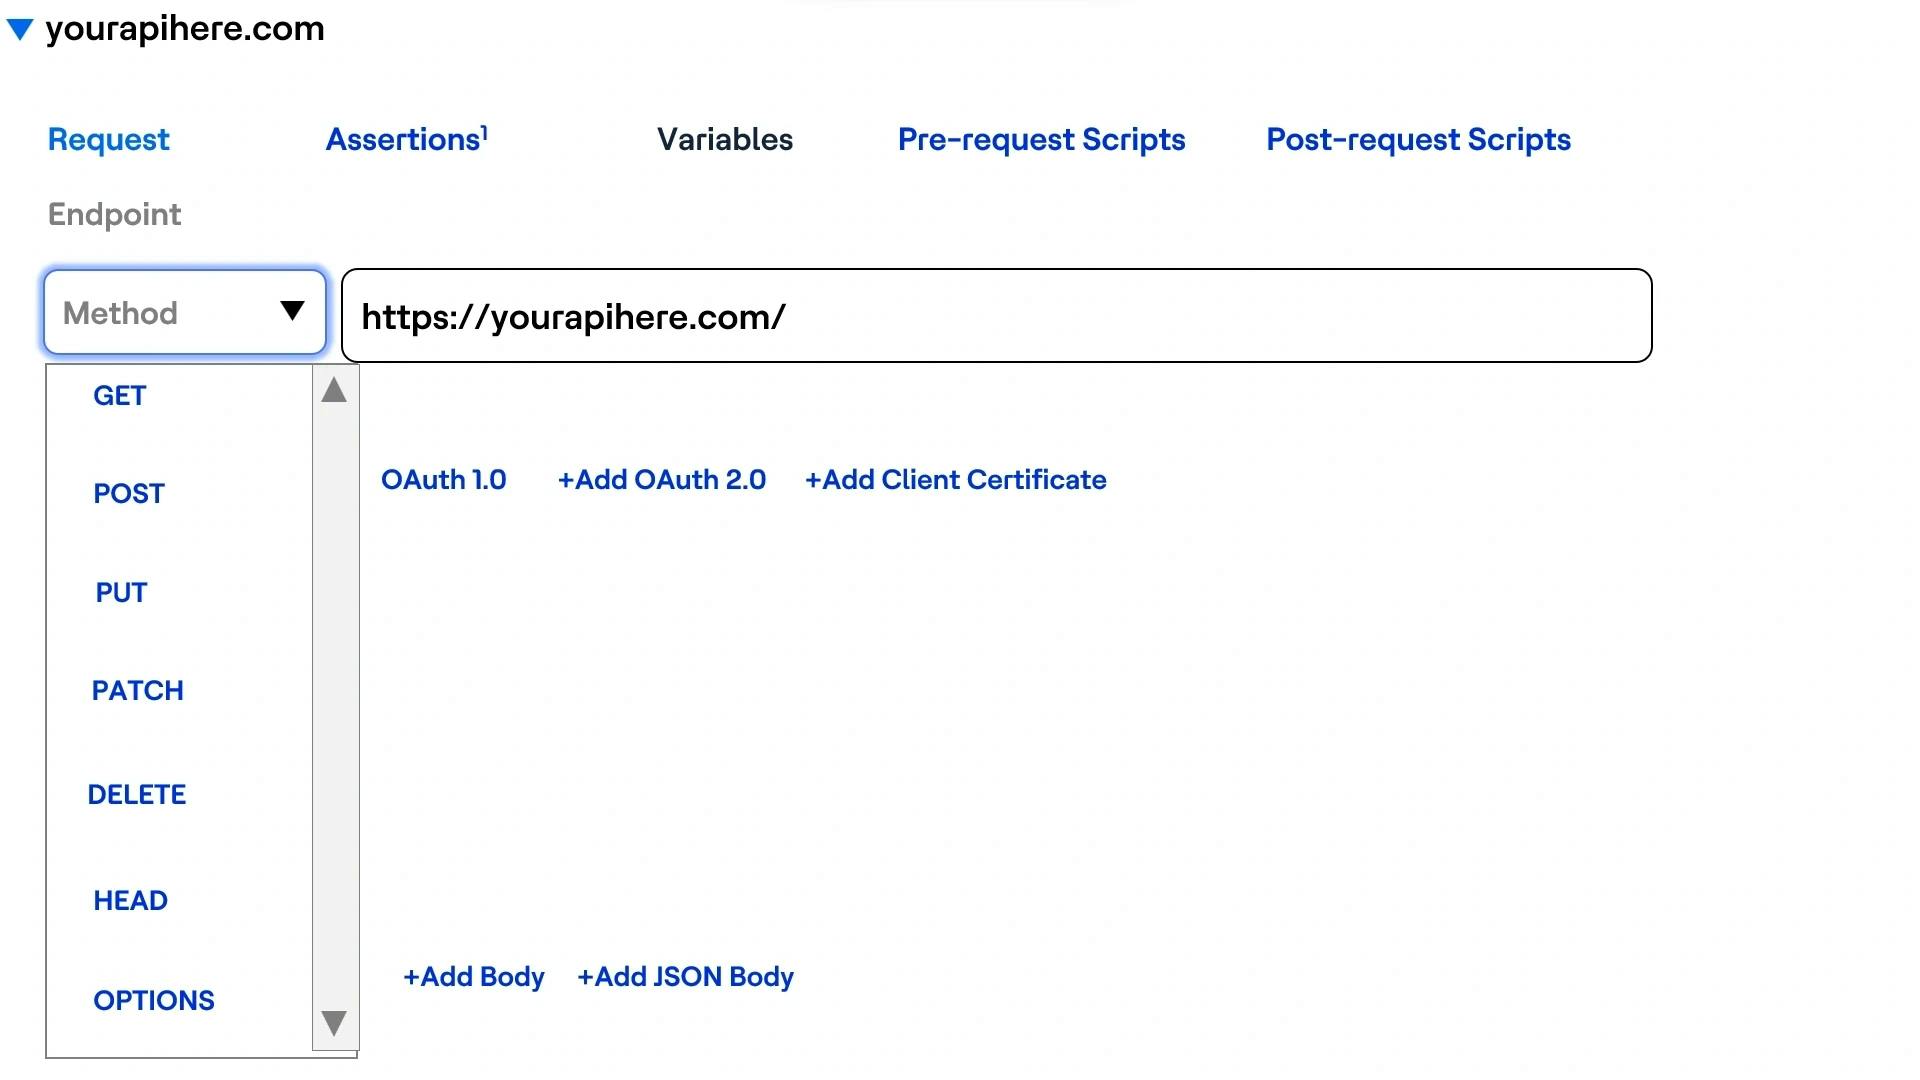
(Note: We can select the type of authentication (Basic Auth, OAuth 1.0, OAuth 2.0, etc.) that is required while hitting the URL/API for validation)
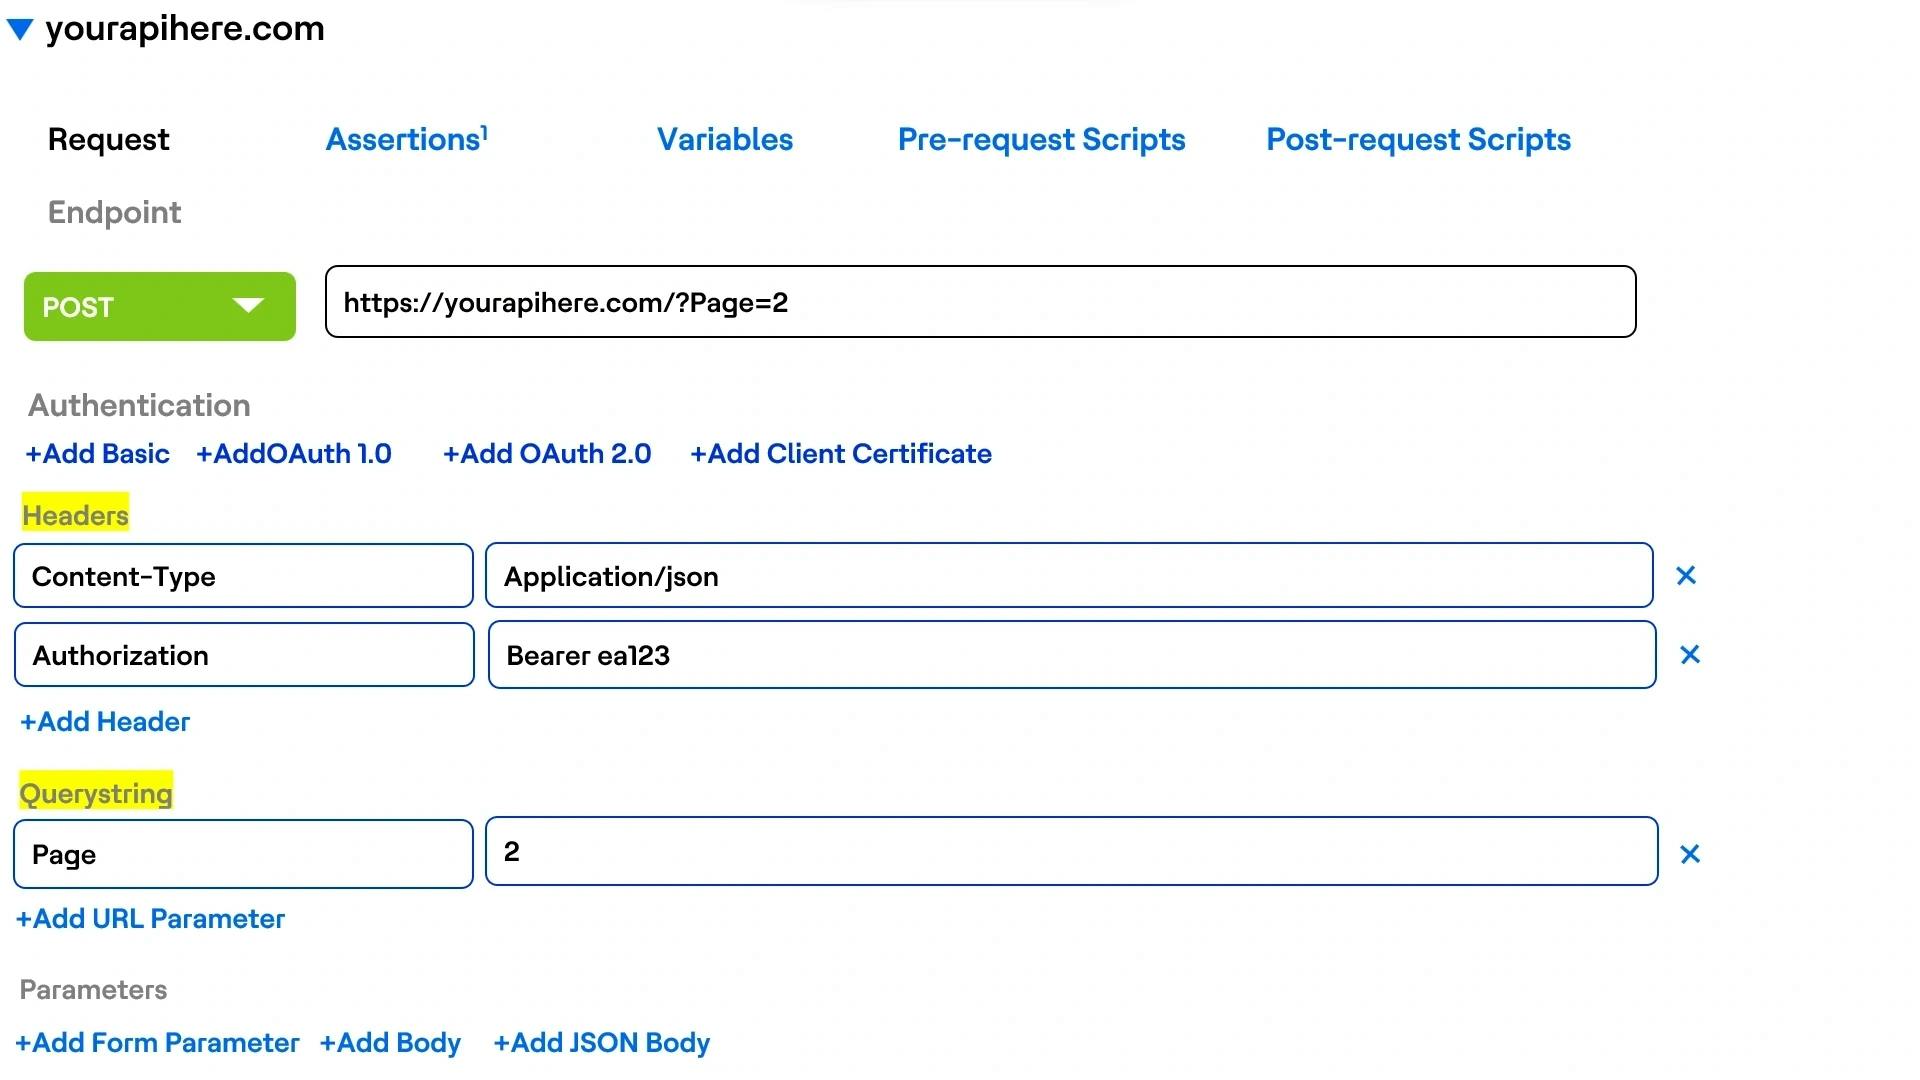
Users can pass the request headers and query parameters from the section highlighted in the screenshot below.
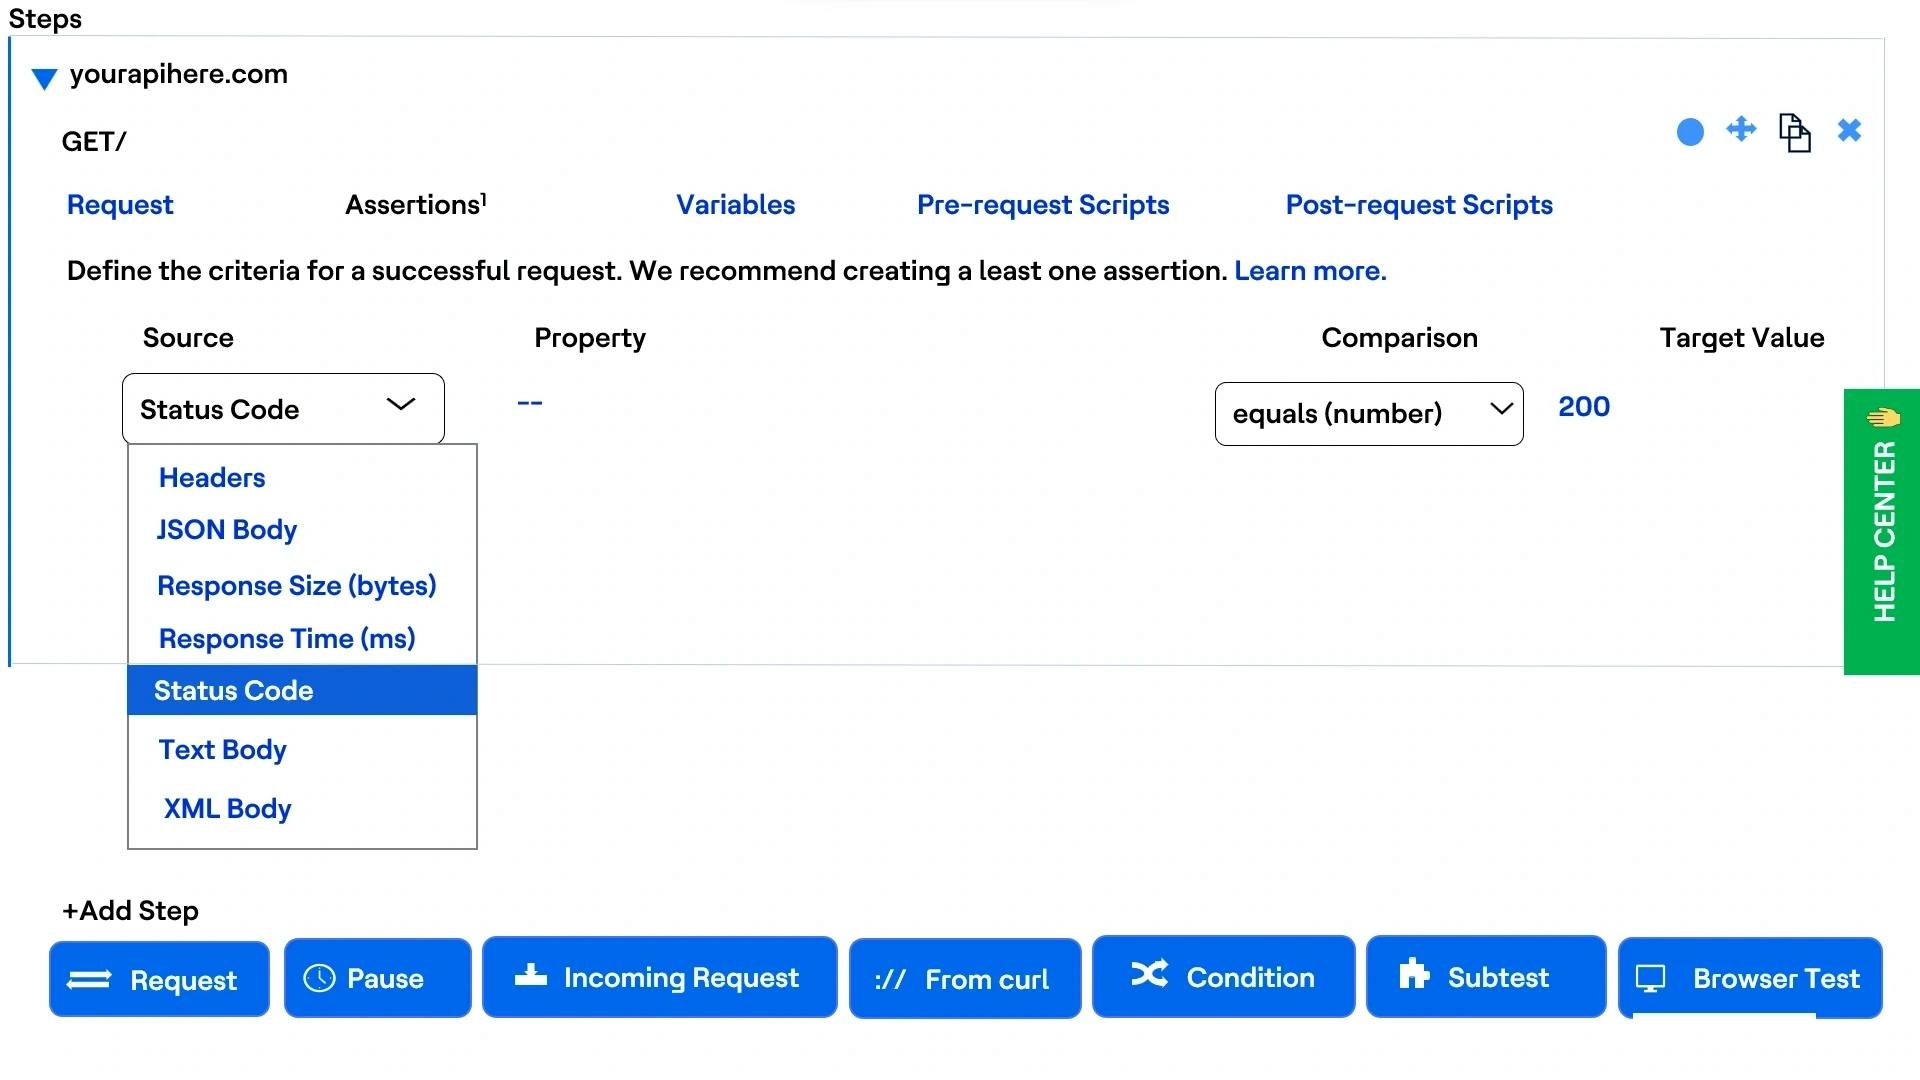
Then, the user can add the Assertions from the Assertions tab to validate the response code and return the results. The following are the Assertion options to validate the expected results.
If the user needs to reuse any value from the response result JSON, then they can extract the JSON response Key and add it to a script-level variable that can be reused in subsequent steps.
Sample snippet for response JSON:
{"employees":[ { "firstName":"John", "lastName":"Doe" }, { "firstName":"Anna", "lastName":"Smith" }, { "firstName":"Peter", "lastName":"Jones" } ]}To extract firstName “John” from the above response JSON, the user can add the variable property as employees[0].firstName
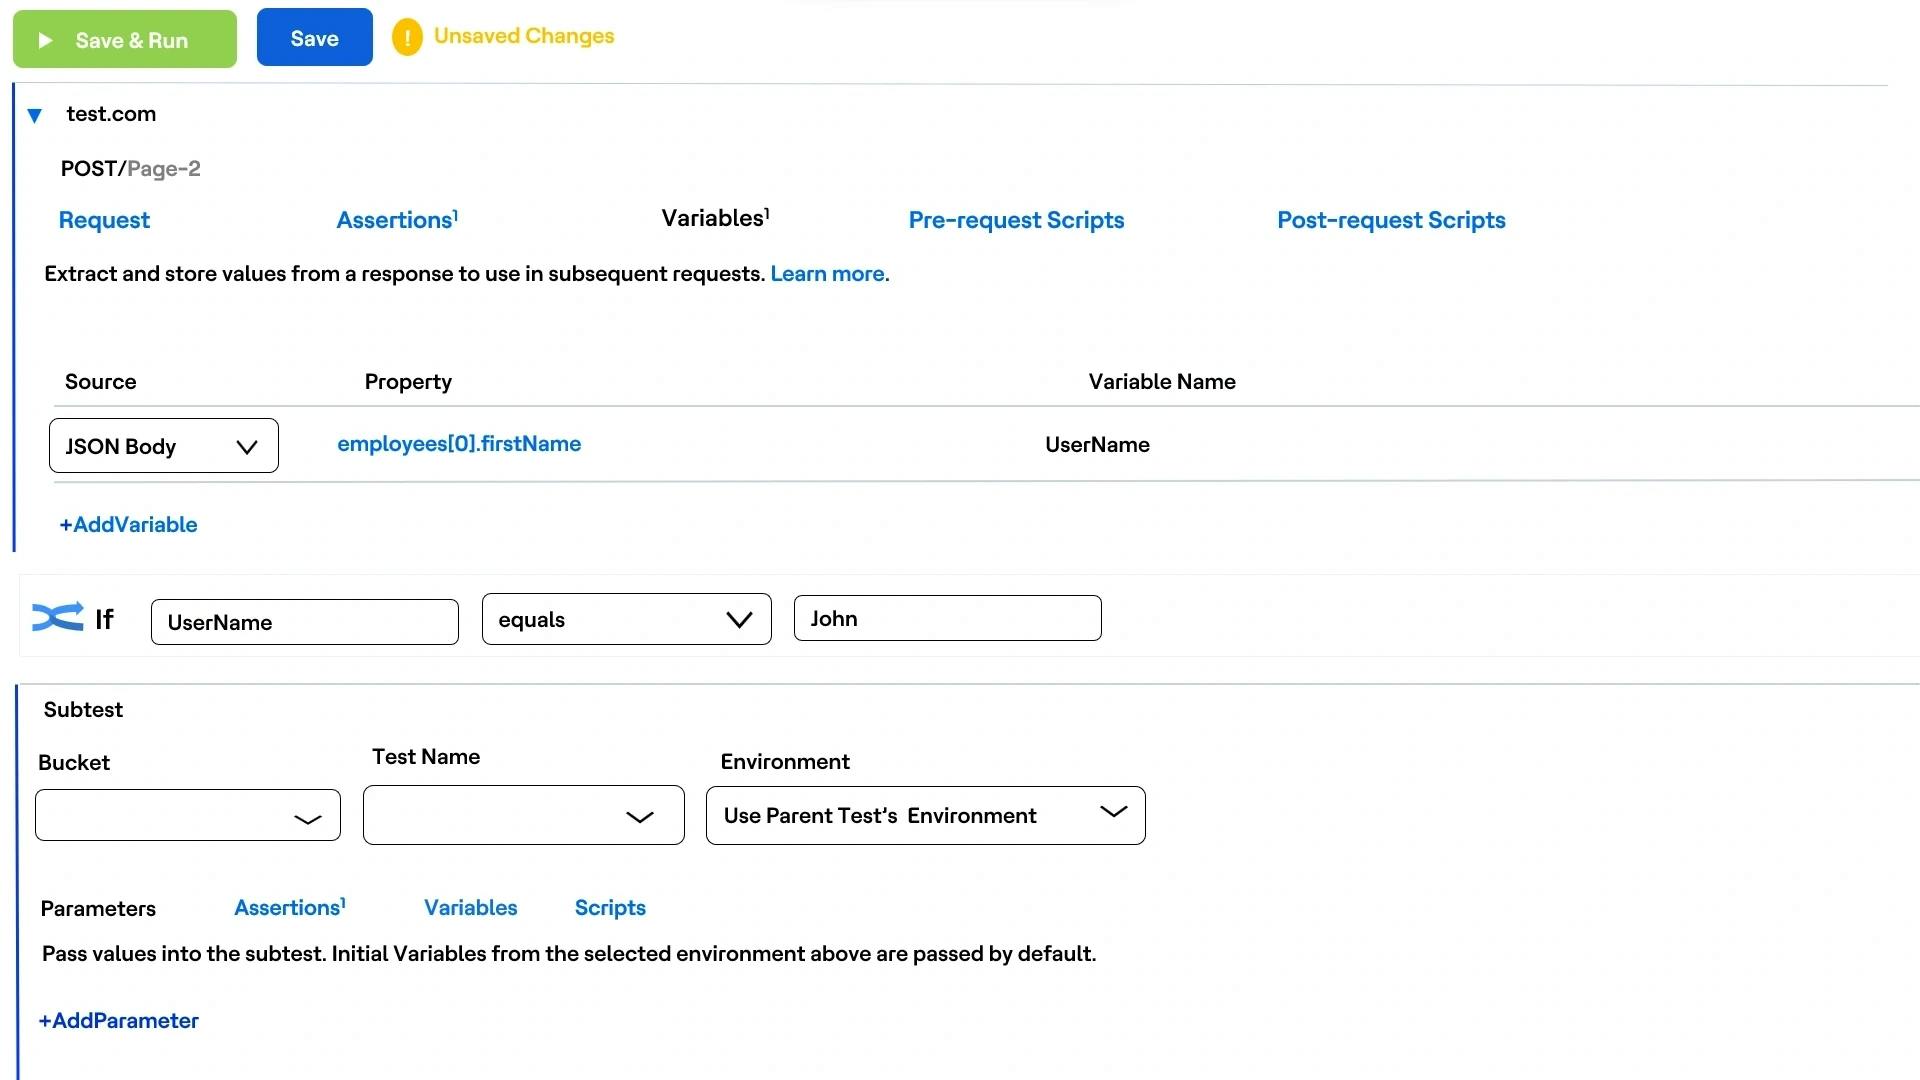
We have the option to add more conditions and include subtests based on the result of the previous Step.
Ex: The user can use the extracted Variable to in a new condition to depend on the next subtest step to be executed. The same can be seen in the below screenshots.


(Note: Create a shared environment from “Add Shared Environment” and provide the initial variables like the API URL to be triggered, login username, Password, etc. Users can also define authentication, headers, etc., while setting up the Shared Environment to be reused in API execution.)
Save and Run
Congratulations! You just created and executed your first API automation test with Blazemeter.
References
https://www.blazemeter.com/product/blazemeter/api-monitoring


